SeasideBishop: A C port of b33f’s UrbanBishop shellcode injector
Introduction
This post covers a recent C port I wrote of b33f’s neat C# shellcode loader UrbanBishop. The prolific Rastamouse also did a veriation of UrbanBishop, using D/Invoke, called RuralBishop. This injection method has some quirks I hadn’t seen done before, so I thought it would be interesting to port it to C.
Credit of course goes to b33f, Rastamouse as well, and special thanks to AsaurusRex and Adamant for their help in getting it working.
The code for this post is available here.
The Code
First, a quick outline of the injection method, and then I will break it down API by API. SeasideBishop creates a section and maps a view of it locally, opens a handle to a remote process, maps a view of that same section into the process, and copies shellcode into the local view. As as view of the same section is also mapped in the remote process, the shellcode has now been allocated across processes. Next a remote thread is created and an APC is queued on it. The thread is alerted and the shellcode runs.
Opening The Remote Process
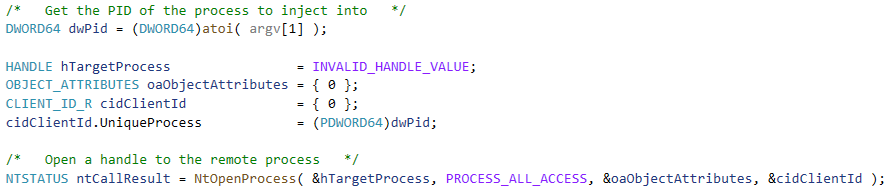
Above we see the use of the native API NtOpenProcess to acquire a handle to the remote process. Native APIs calls are used throughout SeasideBishop as they tend to be a bit more stealthy than Win32 APIs, though they are still vulnerable to userland hooking.
Sections
A neat feature of this technique is the way that the shellcode is allocated in the remote process. Instead of using a more common and suspicious API like WriteProcessMemory, which is well known to AV/EDR products, SeasideBishop takes advantage of memory mapped files. This is a way of copying some or all of a file into memory and operating on it there, rather than manipulating it directly on disk. Another way of using it, which we will do here, is as an inter-process communication (IPC) mechanism. The memory mapped file does not actually need to be an ordinary file on disk. It can be simply a region of memory backed by the system page file. This way two processes can map the same region in their own address space, and any changes are immediately accessible to the other.
The way a region of memory is mapped is by calling the native API NtCreateSection. As the name indicates, a section, or section object, is the term for the memory mapped region.

Above is the call to NtCreateSection within the local process. We create a section with a size of 0x1000, or 4096 bytes. This is enough to hold our demo shellcode, but might need to be increased to accommodate a larger payload. Note that the allocation will be rounded up to the nearest page size, which is normally 4k.
The next step is to create a view of the section. The section object is not directly manipulated, as it represents the file-backed region of memory. We create a view of the section and make changes to that view. The remote process can also map a view using the same section handle, thereby accessing the same section. This is what allows IPC to happen.

Here we see the call to NtMapViewOfSection to create the view in the local process. Notice the use of RW and not RWX permissions, as we simply need to write the shellcode to the view.

Next a simple memcpy writes our shellcode to the view.

Finally we map a view of the same section in the remote process. Note that this time we use RX permissions so that the shellcode is executable. Now we have our shellcode present in the remote process’s memory, without using APIs like WriteProcessMemory. Now let’s work on executing it.
Starting From The End
In order to execute our shellcode in the remote process, we need a thread. In order to create one, we need to give the thread a function or address to begin executing from. Though we are not using Win32 APIs, the documentation for CreateRemoteThreadEx still applies. We need a “pointer to [an] application-defined function of type LPTHREAD_START_ROUTINE to be executed by the thread and [serve as] the starting address of the thread in the remote process. The function must exist in the remote process.” The function we will use is RtlExitUserThread. This is not a very well documented function, but debugging indicates that this function is part of the thread termination process. So if we tell our thread to begin executing at this function, we are guaranteed that the thread will exit gracefully. That’s always a good thing when injecting into remote processes.
So now that we know the thread will exit, how do we get it to execute our code? We’ll get there soon, but first we need to get the address of RtlExitUserThread so that we can use it as the start address of our new remote thread.
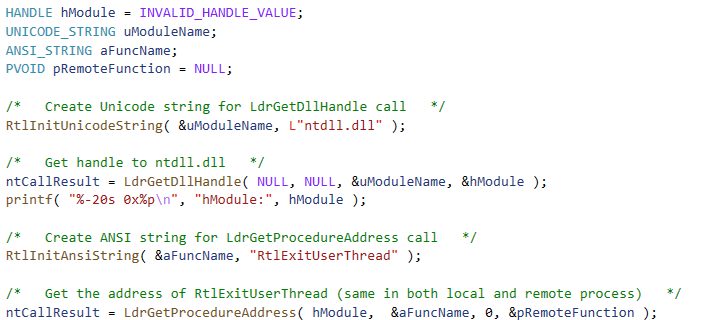
There’s a lot going on here, but it’s really pretty simple. RtlExitUserThread is exported by ntdll.dll, so we need the DLL base address first before we can access its exports. We create the Unicode string needed by the LdrGetDllHandle native API call and then call it to get the address of ntdll.dll. With that done, we need to create the ANSI string required by LdrGetProcedureAddress to get the address of the RtlExitUserThread function. Again, notice no suspicious calls to LoadLibrary or GetProcAddress here.
Creating The Thread
Now that we have our thread start address, we can create it in the remote process.

Here we have the call to NtCreateThreadEx that creates the thread in the target process. Note the use of the pRemoteFunction variable, which contains the start address of RtlExitUserThread. Note also that the true argument above is a Boolean value for the CreateSuspended parameter, which means that the thread will be created in a suspended state and will not immediately begin executing. This will give us time to tell it about the shellcode we’d like it to run.
Execution
We’re in the home stretch now. The shellcode is in the remote process and we have a thread ready to execute it. We just need to connect the two together. To do that, we will queue an Asynchronous Procedure Call (APC) on the remote thread. APCs are a way of asynchronously letting a thread know that we have work for it to do. Each thread maintains an APC queue. When the thread is next scheduled, it will check that queue and run any APCs that are waiting for it, and then continue with its normal work. In our case, that work will be to run the RtlExitUserThread function and therefore exit gracefully.

Here we see how the thread and our shellcode meet. We use NtQueueApcThread to queue an APC onto the remote thread, using lpRemoteSection to point to the view containing the shellcode we mapped into the remote process earlier. Once the thread is alerted, it will check its APC queue and see our APC waiting for it.

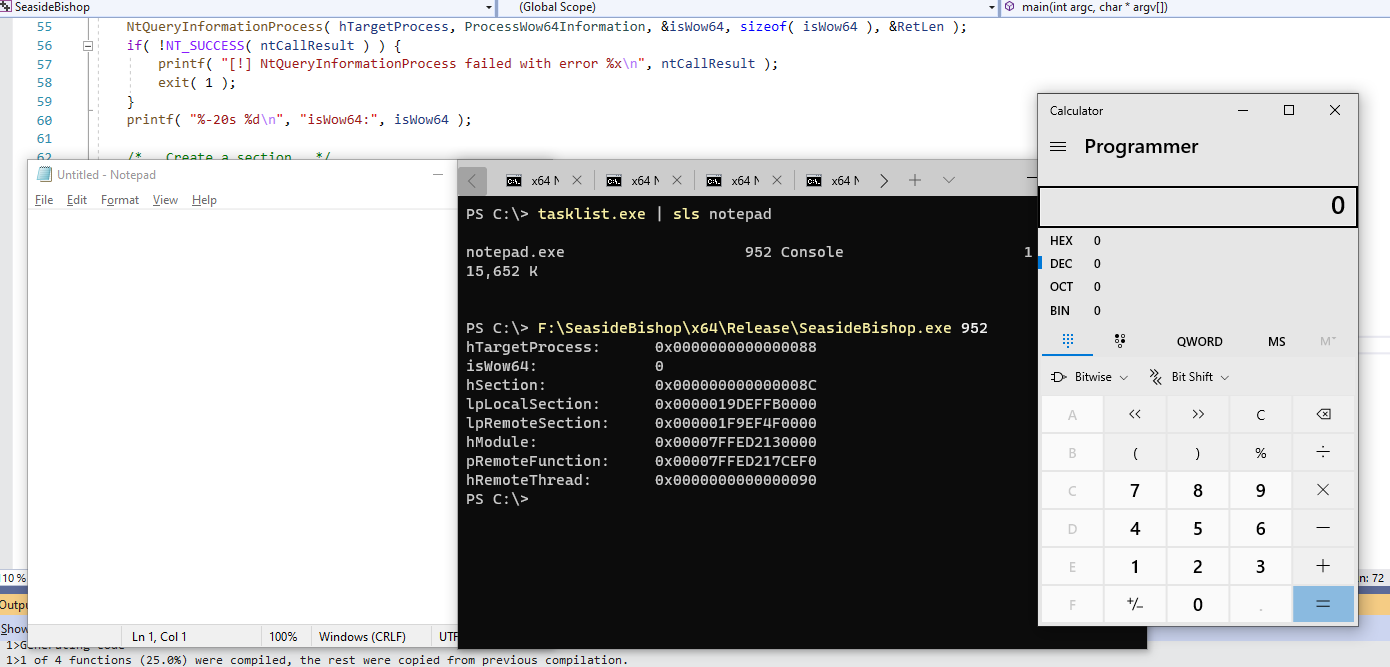
A quick call to NtAlertResumeThread and the thread is alerted and runs our shellcode. Which of course pops the obligatory calc.
Conclusion
I thought this was a neat injection method, with some quirks I hadn’t seen before, and I enjoyed porting it over to C and learning the concepts behind it in more detail. Hopefully others will find this useful as well.
Thanks again to b33f, Rasta, Adamant, and AsaurusRex for their help!